河北网站建设公司广告推广公司
过程概要
1.前提配置 关防火墙 关selinux
2.安装web服务程序nginx
3.查看nginx是否开启
4.为当前主机添加多地址(ip a)
5.自定义nginx配置文件通过多地址区分多网站
/etc/nginx/conf.d/test_ip.conf
server { #标记为一个虚拟主机
}
6.根据配置在主机创建数据文件
7.重启服务加载配置
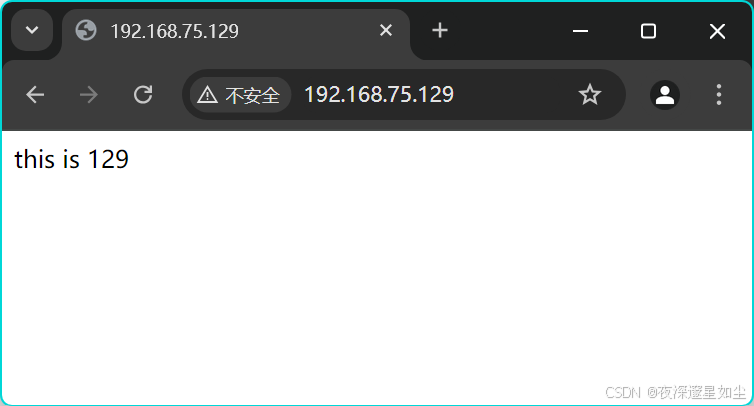
8.客户端连接测试
1.关闭防火墙和SELinux
[root@localhost ~]# systemctl stop firewalld[root@localhost ~]# setenforce 02.挂载并下载nginx
[root@localhost ~]# mount  /dev/sr0 /mnt
mount: /mnt: WARNING: source write-protected, mounted read-only.
[root@localhost ~]# dnf install nginx -y
3.开启nginx服务并查看是否成功
[root@localhost ~]# systemctl start nginx
[root@localhost ~]# netstat -tunlp
Active Internet connections (only servers)
Proto Recv-Q Send-Q Local Address           Foreign Address         State       PID/Program name
tcp        0      0 0.0.0.0:80              0.0.0.0:*               LISTEN      3048/nginx: master
tcp        0      0 127.0.0.1:631           0.0.0.0:*               LISTEN      971/cupsd
tcp        0      0 0.0.0.0:22              0.0.0.0:*               LISTEN      973/sshd: /usr/sbin
tcp        0      0 127.0.0.1:6010          0.0.0.0:*               LISTEN      2905/sshd: root@pts
tcp6       0      0 ::1:631                 :::*                    LISTEN      971/cupsd
tcp6       0      0 :::80                   :::*                    LISTEN      3048/nginx: master
tcp6       0      0 :::22                   :::*                    LISTEN      973/sshd: /usr/sbin
tcp6       0      0 ::1:6010                :::*                    LISTEN      2905/sshd: root@pts
udp        0      0 127.0.0.1:323           0.0.0.0:*                           896/chronyd
udp        0      0 0.0.0.0:47763           0.0.0.0:*                           856/avahi-daemon: r
udp        0      0 0.0.0.0:5353            0.0.0.0:*                           856/avahi-daemon: r
udp6       0      0 ::1:323                 :::*                                896/chronyd
udp6       0      0 :::58420                :::*                                856/avahi-daemon: r
udp6       0      0 :::5353                 :::*                                856/avahi-daemon: r
4.添加多个IP并查看是否成功
[root@localhost ~]# nmcli connection modify ens160 ipv4.method manual ipv4.addresses 192.168.75.130/24 ipv4.gateway 192.168.75.2 ipv4.dns 114.114.114.114 +ipv4.addresses 192.168.75.129/24
#使用 nmcli connection modify 命令修改了 ens160 网络连接的 IPv4 设置。
#将 IPv4 的配置方式设置为手动(manual)。
#为 ens160 分配了两个静态 IP 地址:192.168.75.130/24 和 192.168.75.129/24。
#设置了默认网关为 192.168.75.2。
#设置了 DNS 服务器地址为 114.114.114.114。
[root@localhost ~]# nmcli connection up ens160
连接已成功激活(D-Bus 活动路径:/org/freedesktop/NetworkManager/ActiveConnection/3)
[root@localhost ~]# ip a
1: lo: <LOOPBACK,UP,LOWER_UP> mtu 65536 qdisc noqueue state UNKNOWN group default qlen 1000link/loopback 00:00:00:00:00:00 brd 00:00:00:00:00:00inet 127.0.0.1/8 scope host lovalid_lft forever preferred_lft foreverinet6 ::1/128 scope host valid_lft forever preferred_lft forever
2: ens160: <BROADCAST,MULTICAST,UP,LOWER_UP> mtu 1500 qdisc fq_codel state UP group default qlen 1000link/ether 00:0c:29:d5:ed:f0 brd ff:ff:ff:ff:ff:ffaltname enp3s0inet 192.168.75.130/24 brd 192.168.75.255 scope global noprefixroute ens160valid_lft forever preferred_lft foreverinet 192.168.75.129/24 brd 192.168.75.255 scope global secondary noprefixroute ens160valid_lft forever preferred_lft foreverinet6 fe80::20c:29ff:fed5:edf0/64 scope link noprefixroute valid_lft forever preferred_lft forever
5自定义nginx配置文件通过多地址区分多网站
[root@localhost ~]# vim /etc/nginx/conf.d/test_ip.conf server {listen 192.168.75.129:80;root /test/129;location / {index  index.html;}
}
server {listen 192.168.75.130:80;root /test/130;location / {index  index.html;}
}
6.根据配置在主机创建数据文件
[root@localhost ~]# mkdir /test/{129,130} -pv
mkdir: 已创建目录 '/test'
mkdir: 已创建目录 '/test/129'
mkdir: 已创建目录 '/test/130'[root@localhost ~]# echo this is 129 > /test/129/index.html
[root@localhost ~]# echo this is 130 > /test/130/index.html
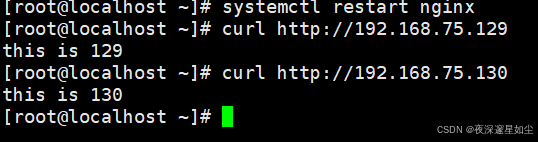
7.重启服务加载配置
[root@node1 ~]# systemctl restart nginx 8.客户端连接测试